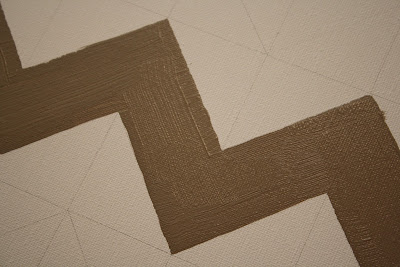
We are in the midst of a mini laundry room makeover (PLEASE let it be done soon!) and I wanted to create some new artwork...
Gather your materials.
Please notice the tape in the picture. This is because I was going to originally try to tape off the design, but after a
Depending on where you are hanging, will determine the size of your canvas. Mine is a 16x20.
Based on the size of my canvas, I decide to use a 2 inch square to create the chevron stripe. This was simply because it divided equally.
Using a pencil, lightly create a grid.
Then you will want to play connect the
Once all of the lines are drawn you will want to mark which stripe will be which color.
Our laundry room is light blue so I went with a light grey and silver chevron stripe. (I decided to add the silver last minute to put some glam into the room). It took two coats of the light grey and the glitter paint.
 |
| This was my first grey attempt...Grey Wolf- more wolf than grey. Who knew it was such a difficult color to get right?! |
 |
| Initial that I chose printed out. Used PowerPoint so that I could enlarge it enough |
 |
| Initial cut out and in correct placement- ready to trace. |
 |
| Initial traced and ready to be painted. |
I wanted to complement the blue room and chose a brighter blue for the initial.
To make the piece look more finished I hot glued ribbon along the edge of the canvas.
There you have it.... A homemade chevron print for less than $10....and the world's longest post! ;)
P.S. I am not a 'fancy' crafter... I own pretty basic equipment (no fancy printer or Silhouette, etc). I will also be honest with you and tell you about my mistakes so that you don't have to go through them too.
So if I can do it, so can you!
Happy Crafting!!


No comments