These flowers are a showstopper for very little money! Whether for your classroom decor, nursery, or a party- with a little time and effort, you can create these beauties that will last years!
Now, I am not the first to ever write a post on these (in fact I am going to direct you to someone else’s site for the template), but I get tons of questions and requests about them every year I post my classroom décor.
The first thing you will want to do is find a template. There are hundreds of them out there if you just Google ‘paper flower template’. I prefer this one.
Once you find your template, you can do one of two things.
If you are talented at using your Cricut you can use the files to cut that way. If you are old school like me- start tracing and cutting!
The number of petals you will need will depend on the size of the flower you want.
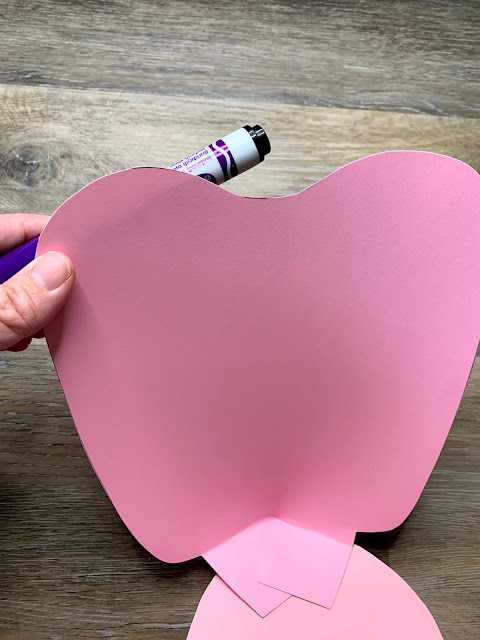
After you have all pieces cut out, you will want to roll the edges of the petals to give them personality. I use a marker or pencil to do this.
You will also need a small circle to attach the flower petals to. I usually just trace a cereal bowl. (I’m telling you there is nothing high tech or difficult here!)
Next you are going to fold the bottom of the petal where you will be gluing it to the center. After you fold it, you are going to want to put a 1.5 inch slit at the bottom.
Now it’s time to start gluing.
First you are going to slightly overlap the pieces you created with that cut.
Then you will place glue on the back of the petal (the bottom part you folded) and attach to the circle. You will place them next to one another, you can even slightly overlap them if you’d like.
Once all the largest petals are placed, you will move to the next layer with the next largest size petal.
Continue this process until all petals are glued on.
Now to finish. There are several types of centers you can create (again let Google be your friend). I like to utilize a frilly-type center.
To create this, you will cut an 8.5 x 11 sheet of paper in half vertically.
Take one piece and fold it in half like so.
Now, cut slits (starting with the open edge) down the whole thing but be careful so you don’t go all the way through.
Keeping it folded, roll it up. You may need a couple of them to make it big enough.
And glue them to the center.
Now you’ve got one of the most beautiful flowers to decorate your classroom with.
Mix your sizes, choose your favorite colors, and create a show stopping backdrop!


No comments